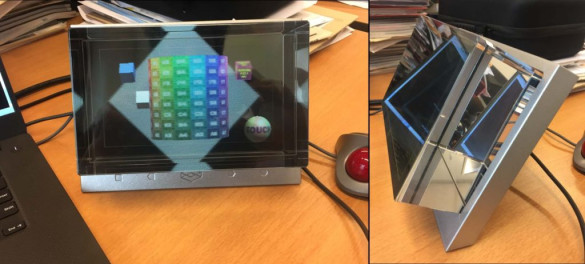
Side-note: the Looking Glass creators use the term “holographic” and we use the world “hologram” below, even though that term refers to a very specific optical technique, which the Looking Glass does not use. But the word hologram is starting to become more mainstream in fields such as augmented reality, for referring to a computer-generated virtual object that can be perceived as if really there. The creators themselves describe the Looking Glass as “technically a lightfield display with volumetric characteristics”.
Make the content “come to life”
The main aim of the Looking Glass is for displaying 3D content as if it is really in front of you, being able to see depth and from different sides without needing 3D glasses or a VR headset. In the creator’s own words to make the content “come to life”.
Displays with similar capabilities have been around for quite some time (e.g. multiview and auto-stereoscopic displays), which usually take the form of a regular desktop monitor. The Looking Glass deliberately uses a different form factor. The transparent block (we guess) serves foremost to magnify the displayed image, allowing a relatively small display to still produce a nicely sized hologram. Secondly, it allows creators of content to place the hologram within the transparent block. This has a nice psychological effect, as the hologram is not floating in mid-air, but appears to be captured in the glass. It’s subtle, but somehow makes the holograms more attractive and tangible.
Any type of 3D content can, in principle, be used such as 3D models, rendered 3D animations, or interactive 3D applications. If produced correctly (see below) 3D content will look pretty real, as you can move your head in front of the display to look at different sides of (say) a 3D model, while perceiving depth at the same time. It’s certainly an attractive and convincing embodiment of stereoscopic displays. The viewing distance has actually quite a nice range. Up close at 20 cm, or even at 2 meters away, it produces good-looking holograms with noticeable depth. The field of view angle in which the content can be viewed without distortions is estimated to be around 50 degrees.
Some more in-depth technical details are described below but the way Looking Glass works is that the transparent block is attached to an LCD display with a sheet of thin lenticular lenses sandwiched in between (each tiny lens is basically a cylinder cut length-wise and many of them are tightly stacked side-by-side). The display+lenses+block assembly makes it possible to limit the visibility of each pixel in the LCD display to a specific viewpoint (this in contrast to a regular display where you can see a pixel from basically every position in front of the display). In this way it becomes possible to show a different image to each of a viewer’s two eyes, as they see different sets of pixels. This provides the basis for stereoscopic viewing, i.e. suggesting depth in the content being shown.
What’s more, the Looking Glass has enough resolution to show content with (roughly) 45 different viewpoints at the same time. This makes it possible to move your head in front of the Looking Glass and get a different and realistic view in each position.
One limitation is that the different viewpoints all lie in a horizontal plane. This means that when moving your head vertically the viewpoint stays the same. More precisely, it changes to a slightly different viewpoint horizontally due to the lens sheet being rotated, but it’s hardly noticeable. The lack of different viewpoints in the vertical direction is far more noticeable. And you get used to the limit of only having different viewpoints horizontally. But adding viewpoints vertically would certainly make the holograms even more convincing.
Another issue is that the transparent block is pretty reflective, so getting a clear view of the holographic content when you’re in a room with lots of bright surfaces can be a bit difficult.
Producing content
Creating content for the Looking Glass is a bit more involved than producing regular image content, as can be expected. The basic workflow is to create a set of images, one for each viewpoint, and combine these into a so-called “quilt”. The latter is nothing more than an arrangement of the viewpoint images into a single larger image by placing them in rows and columns:
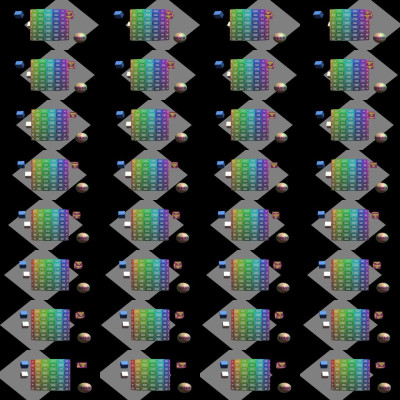
The quilt image is then taken by the software tools that come with the Looking Glass and shown in the correct manner on the display. There is a trade-off in the number of views used versus their resolution: more views will result in a smoother viewing experience of the hologram, but the quilt image has a fixed maximum resolution so more views means fewer pixels per view and therefore less detail.
By the way, quilt images don’t have to be pre-rendered, but can be generated in real-time using 3D rendering libraries, such as Three.js, OpenGL or the Unity game engine. However, for each view the 3D scene will need to be rendered (although at a fairly low resolution), so a hit in frame rate and interactivity is to be expected.
Several software libraries are being released that hide most of the per-view rendering and quilt processing. Currently, the main application supporting creation of 3D content is the Unity game engine. A software development kit is provided with which it is very easy to create and test content for the Looking Glass. Standalone applications can then be produced using the regular Unity workflow. Below the transparent block are 4 buttons, that can be used to control some interactive aspect of the application being run. There are also quite a few examples of using a Leap Motion together with the Looking Glass for natural hand interaction.
Alternatives for producing real-time (interactive) applications are the libraries for Three.js and OpenGL (the latter is currently only available in a closed beta program).
For producing pre-rendered 3D content support libraries for Blender are being finalized and are currently available in a closed beta program. Maya support was initially announced, but has been placed on hold, due to resource availability.
There’s also a “Library” demo application available with some nice examples of Looking Glass content, but it doesn’t seem possible to add your own content to it at the moment. Also, the Library application itself already takes up quite a bit of GPU performance, apparently leaving less performance available for the actual application being run.
Usability in a scientific context?
The current resolution of the Looking Glass is still fairly limited when it comes to scientific use. Although, to be fair, we haven’t tried the larger model that is available yet, which is a bit more expensive at US$3,000. The normal model used here is currently US$600.
As noted in the previous section there’s a trade-off in how much resolution you use per view, versus the number of views. When using 45 views you get only around 820×455 pixels per view. That’s not a resolution with which you can show much detail, compared to the average desktop monitor easily having 1920×1080 or more pixels these days. Strangely, the preset available in the Looking Glass Unity SDK for using fewer views, 32 in a 4×8 quilt, also uses a lower-resolution quilt of only 2048×2048 pixels. This leads to 512×256 pixels per view, even worse.
Also, due to the effect of seeing different view images for LCD pixels that are close together some parts of the hologram will appear somewhat noisy. So current applications for visualization and analysis appear limited. But the potential for an attractive way of showing 3D scientific content is definitely there.
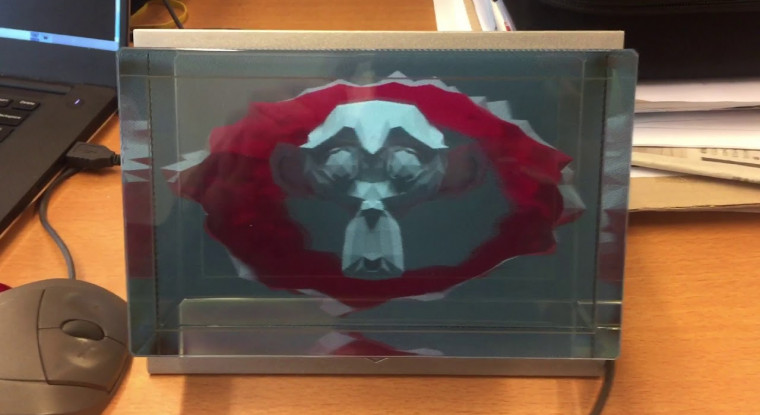
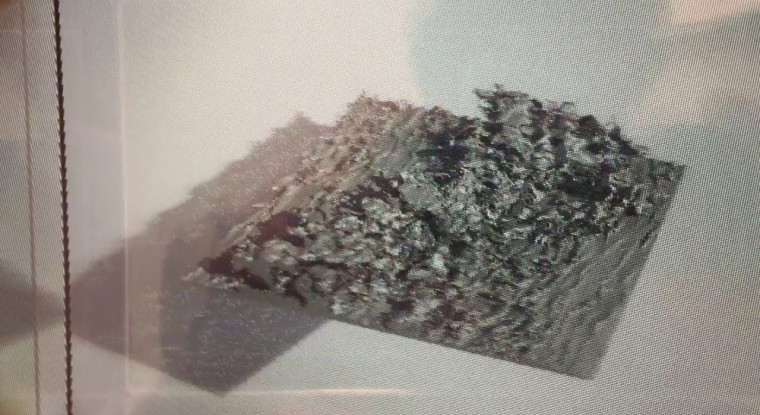
Below is a short movie showing a 3D model of roughly 260,000 triangles in the Looking Glass, using the 3D model viewer that is part of the Library demo application. The 3D model is an isosurface extracted from a fluid simulation done by the University of Twente (see our report 3DATAPRINT in case you’re interested in more details). There’s lots of small structures in the 3D model, which get a bit lost when displaying on the Looking Glass. But this model is certainly not very complex by scientific simulation standards.
To be fair, the Looking Glass in its current form seems to be aimed towards creative, entertaining and educational 3D content. Hopefully the current models will have enough success to spur further development of higher-resolution models in future, allowing its use for applications demanding a higher visual quality.
Another possible issue is that the current toolset only supports Windows and macOS. Support for Linux is being discussed, but is not on the same level yet. This doesn’t mean that the Looking Glass doesn’t work on Linux: it does, as it acts just as a second monitor. However, to display holographic content there are no official tools available. There are some initiatives to develop alternative tooling:
- There’s a GLSL shader available for the mpv movie player that can be used to display pre-rendered movie quilts
- At SURFsara we made some bare-bones Python scripts to experiment with the quilt-to-device mapping and to produce “native images” (basically precomputing the quilt-to-device step).
To use these alternative tools you need to extract the per-device calibration
values (see the next section).
Some technical details
The basis of the Looking Glass is a 2560×1600 pixel LCD display (the larger
model that is available uses 3840×2160 pixels). The technique used to provide viewpoint-dependent images is to place a slanted lenticular lens array in front of the display. In this scheme the lenses are slightly rotated compared to the vertical columns of pixels. This is a technique pioneered by Philips more than 20 years ago (see patent, which has since expired if our math is correct).
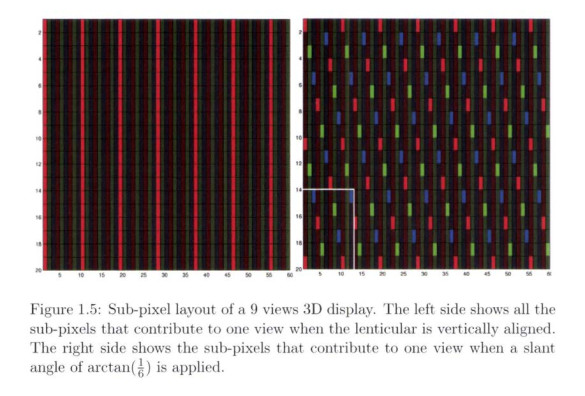
Slanting the lens array has multiple advantages. First, in the LCD display there is a bit of space between the RGB sub-pixels, from which (of course) no light is emitted. If the lens array would be perfectly vertical one would notice this so-called “black mask” as visible black lines while moving from viewpoint to viewpoint (the transition from viewing one pixel to the next would be discrete). Slanting the lens array causes nearby viewpoint pixels to get replaced at different moments, making the black mask effect much less noticeable.
Secondly, the horizontal resolution of the display would effectively be reduced by the number of viewpoints to be supported. For example, 2560 pixels horizontally divided over 45 views would only leave around 57 pixels horizontally for each view. Using fewer views could be an option, but this would make the holographic effect much less convincing. But by slanting the lens array the reduction of resolution is happening in both the horizontal and vertical direction combined, with a smaller reduction per direction.
See the picture below, by M. Sluijter, for the difference in visible pixels between a vertical lens array (left) and a slanted lens array (right):
Interestingly, during manufacturing each Looking Glass device ends up with a slightly imperfect alignment between the LCD pixels and the sheet of lenticular lenses. This very small misalignment causes the sets of pixels per viewpoint to become different for each device. To overcome this each Looking Glass device contains calibration values (determined in the factory) that are used to slightly tweak the mapping from quilt image to LCD pixels before displaying them. In this way content for the Looking Glass can be shared and displayed correctly on every device.
There is currently no official tool to extract these values, but a number of unofficial ones have emerged:
- The pluton library for the Rust language, see here for info how to use it
- Our own port of the Rust code to Python is available here. It requires the hidapi Python module to run.
- One of the first pioneers for extracting the values was published on Github, but we could not get it to work.
The calibration values on the device are in the form of a JSON string already, so no parsing is necessary. However, the meaning of the values is not publicly specified anywhere, but some (correct) guesses have been made so far.
Final notes
All in all, the Looking Glass is an interesting device. It’s certainly not perfect, but provides quite a good holographic viewing experience. Once again, note that we only looked at the standard (smaller) version of the Looking Glass, the large version might be substantially better.
Since auto-stereoscopic displays are not very common in daily life the Looking Glass stands out, not just by the use of the big transparent block, but also because it doesn’t look like a regular monitor. There’s even some extra white LEDs around the edge of the display that can be turned on with a small button on the backside to draw more attention.
A nice practical feature is that there’s no separate power adapter required for the Looking Glass, as it gets its power through USB. This is especially useful when using it on location. The only other connection needed is HDMI, for providing the images to show. As such, it acts as a normal second monitor.
References
• Looking Glass on Kickstarter
• Van Berkel et. al, 2000, Autostereoscopic display apparatus, US Patent
6,064,424
• Nick Holliman, (2003), 3D Display Systems
• Report 3DATAPRINT: On the use of 3D printing for scientific visualisation
• M. Sluijter, 2005, Ray-Optics Analysis of Switchable Auto-Stereoscopic
Lenticular-Based 2D /3D Displays, Master Thesis, Eindhoven University
of Technology
0 Praat mee